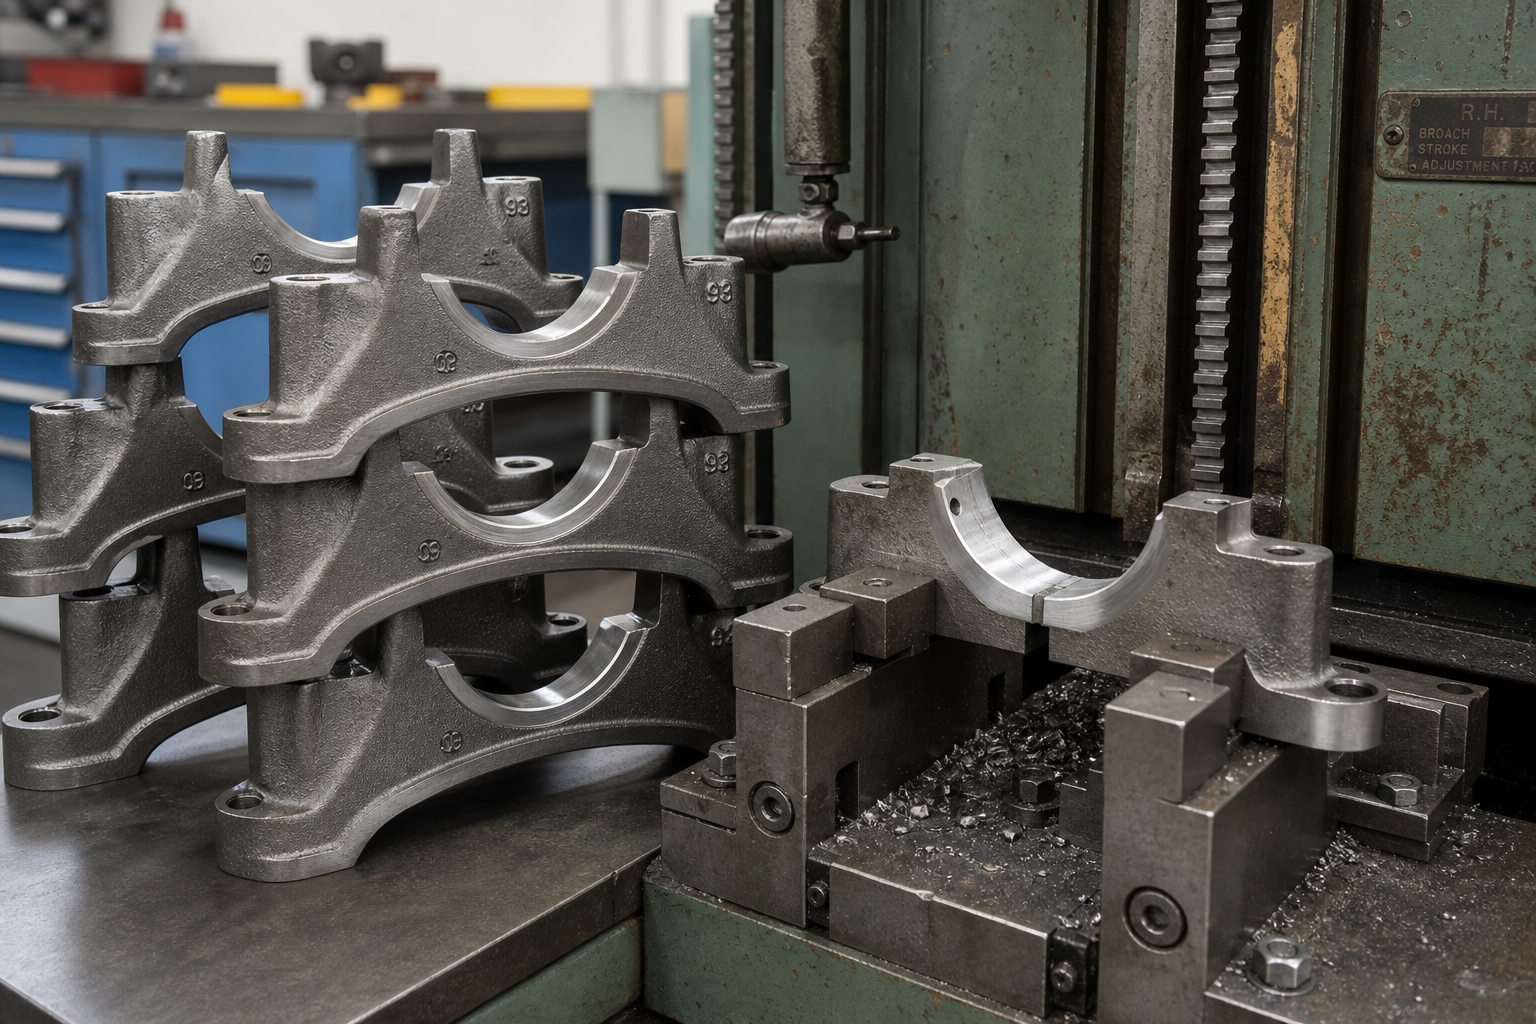
Learning how to use a broaching machine starts with one fact that separates broaching from almost every other cutting process: the tool carries its own feed, and the workpiece does not rotate. A broaching machine pulls or pushes a long, multi-toothed broach through or past the workpiece in one straight stroke, and every tooth removes its own preset layer of metal. This guide walks through how the process works, the machine families you will meet, how to set up the fixture and the broach, the working sequence from blank to finished part, the speeds and coolant that keep the cut healthy, and the safety and broach-care practices that keep the operation repeatable.
সূচিপত্র
- How Broaching Works
- Know the Machine: Vertical, Horizontal, Internal and Surface
- Broaching Machine Setup: Fixture, Broach and Alignment
- How to Use a Broaching Machine: The Working Sequence
- Setting Cutting Speed, Tooth Rise and Coolant
- Broaching Machine Safety
- Maintenance and Broach Care
- প্রায়শই জিজ্ঞাসিত প্রশ্নাবলী
- Talk to Us About Your Broaching Application
- References
How Broaching Works
If the process itself is new to you, start with our overview of what broaching is. The short version, in the words of a Manufacturing Processes teaching text: "Broaching is a machining process for removal of a layer of material of desired width and depth usually in one stroke by a slender rod or bar type cutter having a series of cutting edges with gradually increased protrusion." Each successive tooth stands a little taller than the one before it, and that rise — not a feed dial — is what sets the chip thickness.
That geometry drives everything about how the machine is used. "In broaching, generally the job remains fixed and the broach travels providing cutting velocity," the same lesson notes state, and its consequence is blunt: "broaching operation / machine needs only one motion which is cutting motion and is mostly imparted to the tool. In broaching feed is provided as tooth rise." The machine's job is to deliver that one motion accurately, under load, stroke after stroke.
The teeth share the work. The lesson's design rule keeps "around 4 to 8 teeth" engaged at any instant, with tooth pitch decided from "p = 1.25 L to 1.5 L where, L = length of the hole or job" — a longer hole calls for a coarser pitch. In Cutting Tool Applications, George Schneider gives the reason in shop terms: "Pitch is calculated so that, preferably, two or more teeth cut simultaneously. This prevents the tool from drifting or chattering."
Finally, the stroke comes in two families with different mechanics. Pull broaches work in tension, which is why most internal broaches are pull type. Push broaches work in compression, and Schneider's rule explains their shape: "A push broach must be relatively short since it is a column in compression and will buckle and break under too heavy a load."
Key takeaways
- The broach carries its own feed: each tooth removes a preset layer, and the machine supplies one straight cutting stroke.
- In conventional broaching the workpiece stays fixtured while the broach travels — nothing rotates.
- Pull broaches work in tension and can be long; push broaches stay short to resist buckling.
Know the Machine: Vertical, Horizontal, Internal and Surface
Before you run one, know what you are standing in front of. "Broaching machines are generally specified by" type, maximum stroke length, maximum working force (pull or push), maximum cutting velocity, power and footprint, the Manufacturing Processes lesson notes list — those are the numbers to check against your part before anything else.
The Vertical Broaching Machine
Schneider's industry overview puts the population split plainly: "About 60 percent of the total numbers of broaching machines in existence are vertical, almost equally divided between vertical internals and vertical surface or combination machines." A vertical broaching machine occupies less floor space and holds its ram rigidly — the lesson notes describe it as "more rigid as the ram is supported by base," used mostly for external or surface broaching, with internal work also possible. Vertical internal machines come in pull-up, pull-down, table-up and push-down configurations; Schneider records pull-up machines "furnished with pulling capacities of 6 to 50 tons, strokes up to 72 inches, and broaching speeds of 30 FPM," and pull-down machines with pulling capacities of 2 to 75 tons and speeds of up to 80 FPM. For the concept-level picture, see what vertical broaching is.
The Horizontal Broaching Machine
"About 40 percent of all broaching machines are now horizontals," Schneider writes, and they are the workhorses of internal broaching: "These are used for internal broaching but external broaching work are also possible. The horizontal broaching machines are usually hydraulically driven and occupies large floor space," the lesson notes add. Strokes run long — on hydraulic horizontal internal machines, "Strokes up to 120 inches are available, with cutting speeds generally limited to less than 40 FPM," Schneider reports. Our guides to what horizontal broaching is এবং difference between horizontal and vertical broaching machines cover the choice in depth.
Drive and Surface Work
"Most of the broaching machines have hydraulic drive for the cutting motion. Electro-mechanical drives are also used preferably for high speed of work but light cuts," the lesson notes state. Surface broaching pushes speeds higher still: Schneider records older hydraulic horizontal surface machines at "normal cutting speeds of 100 FPM," while electromechanical surface machines reach "cutting speeds, in some instances, of over 300 FPM."
Broaching Machine Setup: Fixture, Broach and Alignment
Broaching machine setup divides cleanly into two sides of the cut: the workpiece side and the tool side.
The fixture. "The blanks are repeatedly mounted one after another in an appropriate fixture where the blanks can be easily, quickly and accurately located, supported and clamped," the Manufacturing Processes lesson notes direct. Locate the blank, support it against the cutting load, clamp it without shifting it — in that order, every part. For internal keyway work the fixture usually carries the guide as well: "Internal keyways usually require a slotted bushing or horn to fit the hole, with the keyway broach pulled through the horn, guided by the slot," Schneider writes. Our keyway broaching guide works through that family of setups in detail.
The broach. For internal pull work, Schneider's sequence is the reference: "When an internal pull broach is used, the pull end and front pilot are passed through the starting hole. Then the pull end is locked to the pull head of the broaching machine." The pilot goes through the hole first, and it does two jobs before any tooth touches metal: "The front pilot assures correct axial alignment of the tool with the starting hole, and serves as a check on the starting hole size." A starting hole is a hard requirement for internal work — "Internal broaching requires a starting hole or opening in the workpiece so the broaching tool can be inserted."
On machines with a spring-loaded pull head, the lesson notes describe the locking action: after the pull end enters the head, "the socket is brought forward which causes locking of the broach by the radially moving strips." Confirm the broach is positively retained before the stroke; a broach that releases under full pull load is a serious hazard.
Alignment. Because the process has exactly one motion, alignment is nearly the whole setup. The lesson notes' design priorities for these machines are "only alignments, rigidity and reduction of friction and wear of slides and guides" — check that broach, pull head, fixture and guide share one straight line, and that nothing in the stroke path fouls.
How to Use a Broaching Machine: The Working Sequence
With the machine understood and the setup made, the working sequence is short and repeatable:
- Match the setup. Confirm part number, broach, fixture and drawing revision against the setup sheet. The lesson notes remind that "Separate broach has to be procured and used whenever size, shape and geometry of the job changes" — a broach from the previous job is not a substitute.
- Load the blank. Mount the blank in the fixture: located, supported, clamped. For the first part of a run, measure the starting hole — the front pilot will check it, but catching a wrong hole before the stroke saves the broach.
- Load the broach. Pass the pull end and front pilot through the starting hole and lock the pull end into the pull head. Confirm retention.
- Verify alignment and stroke clearance. Broach, guide and fixture on one line; full stroke clear, including the retriever or follower.
- Set the cutting velocity and coolant. Bring the machine to the speed from the process sheet (more below) and turn on cutting fluid — the lesson notes specify fluids "mainly for lubrication and cooling at the chip – tool interfaces."
- Run the stroke. Initiate the cut and watch it: steady pull, well-formed chips, no change in sound or speed. Stop if anything changes mid-stroke.
- Return and unload. Retract the broach (or release it into the retriever), unload the part, and inspect the first-off against the drawing before releasing the run.
- Repeat and monitor. Broaching earns its keep on volume — the blanks are "repeatedly mounted one after another," and the process delivers "Roughing and finishing in single stroke of the same cutter," as the lesson notes list among its advantages. If output quality drifts, suspect the broach first: "Defects or damages in the broach (cutting edges) severely affect product quality."
When something in the cut goes wrong, our broaching troubleshooting guide maps the common symptoms to their causes.
Setting Cutting Speed, Tooth Rise and Coolant
Broaching has fewer dials than turning or milling, and the ones it has work differently.
Cutting speed. The lesson notes give the working ranges: "In broaching metals and alloys, HSS broaches are used at cutting velocity of 10 to 20 m/min and carbide broaches at 20 to 40 m/min." In Schneider's imperial machine data, vertical internal machines run from 30 FPM on pull-up types up to 80 FPM on pull-down machines, and horizontal internal machines stay below 40 FPM — deliberately moderate speeds for a process that takes its whole cut in one pass. The lesson lists the reason among the process's limitations: "Cutting speed cannot be high."
Tooth rise. There is no feed dial. "In broaching feed is provided as tooth rise," the lesson notes state, and the rise is built into the broach at manufacture: "The value of tooth rise varies within 0.05 mm to 0.2 mm for roughing and 0.01 to 0.04 mm for finishing teeth." Changing the chip load means changing or re-specifying the broach, not turning a handle — and the process is built for it, being "Usable only for light cuts, i.e. low chip load and unhard materials."
Coolant. Cutting fluid in broaching works first at the cutting edge: "Some cutting fluids are preferably used mainly for lubrication and cooling at the chip – tool interfaces." Flood the cut zone for the whole stroke; running an expensive broach dry through steel is false economy.
Broaching Machine Safety
Broaching machine safety centers on three things: the point of operation, the chip stream, and the stored energy of a long tool under full pull load. US occupational safety regulation states the general duty directly — 29 CFR 1910.212 requires that "One or more methods of machine guarding shall be provided to protect the operator and other employees in the machine area from hazards such as those created by point of operation, ingoing nip points, rotating parts, flying chips and sparks." The same standard adds two requirements that fit any fixed machine tool: "Guards shall be affixed to the machine where possible and secured elsewhere if for any reason attachment to the machine is not possible," and "Machines designed for a fixed location shall be securely anchored to prevent walking or moving."
Around the tooling, the practices follow from the physics. Handle broaches carefully — they are precision, expensive cutters, and "Defects or damages in the broach (cutting edges) severely affect product quality," the lesson notes warn. Respect the load limits of push work: a push broach is "a column in compression and will buckle and break under too heavy a load," Schneider writes, and a broach that breaks under load releases the full stroke energy. Lock out the machine before touching the pull head, fixture or guard; keep hands and tools clear of the stroke path; and never defeat an interlock to jog a cycle.
Maintenance and Broach Care
The broach is the asset. "Design, manufacture and restoration of the broaches are difficult and expensive," the lesson notes list among the process's limitations, so maintenance concentrates on protecting the cutter and the slides that carry it.
On the machine side, the lesson's design priorities translate directly into a checklist: alignments, rigidity, and "reduction of friction and wear of slides and guides." Keep the ways clean and lubricated, keep the hydraulic oil clean and at level, and follow the builder's schedule for everything else.
On the tool side, sharpening is a reconditioning job, not a touch-up. Schneider describes why finishing teeth are built with a straight land: "On finishing teeth, part of the land immediately behind the cutting edge is often left straight, so that repeated sharpening (by grinding the face of the tooth) will not alter the tooth size." Form-relieved broaches are sharpened "by grinding at their rake faces," the lesson notes add. Send the broach to a competent regrind shop and inspect it on return.
For the machine-side schedule in full, see our broaching machine preventive maintenance checklist.
প্রায়শই জিজ্ঞাসিত প্রশ্নাবলী
Can you broach a blind hole?
Not on a conventional broaching machine. "Only through holes and surfaces can be machined" — the broach must pass through or past the workpiece, so internal features must be through-features. The exception is a different process class: rotary broaching, which Polygon Solutions describes as producing "extremely accurate polygon forms in blind or thru-holes on any lathe, mill or machining center without the need for a secondary operation." See our guide to rotary broaching tools and holders for that route.
How many parts make broaching worthwhile?
There is no fixed number, but the economics lean on volume from both sides: "broaches tend to be expensive, the cost is justified because of their use for high-production runs," Schneider writes, and the lesson notes' limitation list is blunter — "Economic only when the production volume is large." A dedicated broach amortizes over the run; one-off features in small batches usually belong to other processes.
Talk to Us About Your Broaching Application
Using a broaching machine well comes down to respecting what the process is: one straight stroke, one expensive tool, one fixtured blank — repeated at production rate. If you are specifying the machine rather than the process, our ব্রোচিং মেশিন page covers the line, and the guide to choosing the right broaching machine works through tonnage, stroke and configuration from the part upward. Contact our engineering team with your part drawing and volumes, and we will review the broach, fixture and machine as one system with you.
References
- Cutting Tool Applications, Chapter 14: Broaches and Broaching — Schneider; the multi-tooth single-stroke principle, pull versus push mechanics and push-broach buckling, pull end and front pilot practice, keyway horns, tooth pitch, machine population and speed data, and finishing-tooth sharpening design.
- Broaching, Lesson 4.10 of the Manufacturing Processes instructional notes — Manufacturing Processes lesson notes; the fixed-job and travelling-broach principle, feed as tooth rise, HSS and carbide cutting speeds, tooth-rise ranges, the 4-to-8-teeth pitch rule, fixture and pull-head practice, machine types and drives, and the advantages and limitations lists.
- 29 CFR 1910.212 — General requirements for all machines — US Occupational Safety and Health Administration via eCFR; machine guarding for point of operation and flying chips, guard attachment, and anchoring of fixed machinery.
- Rotary Broaching FAQs — Polygon Solutions; rotary broaching producing polygon forms in blind or through holes on lathes, mills and machining centers.