Every broaching project starts at the same fork in the road: horizontal or vertical? Both configurations drive a multi-tooth broach through or across the workpiece in a single linear stroke, and both cut the same forms — keyways, splines, hexagons, flats, and contours. The cutting physics are identical. What separates the two machines is everything around the cut: how much floor they occupy, how long a stroke they can deliver, how chips leave the work zone, how parts load and unload, and how each fits into a production line.
This article explains the difference between horizontal and vertical broaching machines in seven factors that actually drive the buying decision — with the engineering reasons behind each one — and closes with a four-question decision framework plus a short FAQ. We define each machine briefly, walk through the seven differences that actually drive the buying decision — with the engineering reasons behind each one — and close with a four-question decision framework plus a short FAQ. For the full treatment of either configuration, see our companion guides: the vertical broaching machine complete guide and the horizontal broaching machine guide.

What Is a Horizontal Broaching Machine?
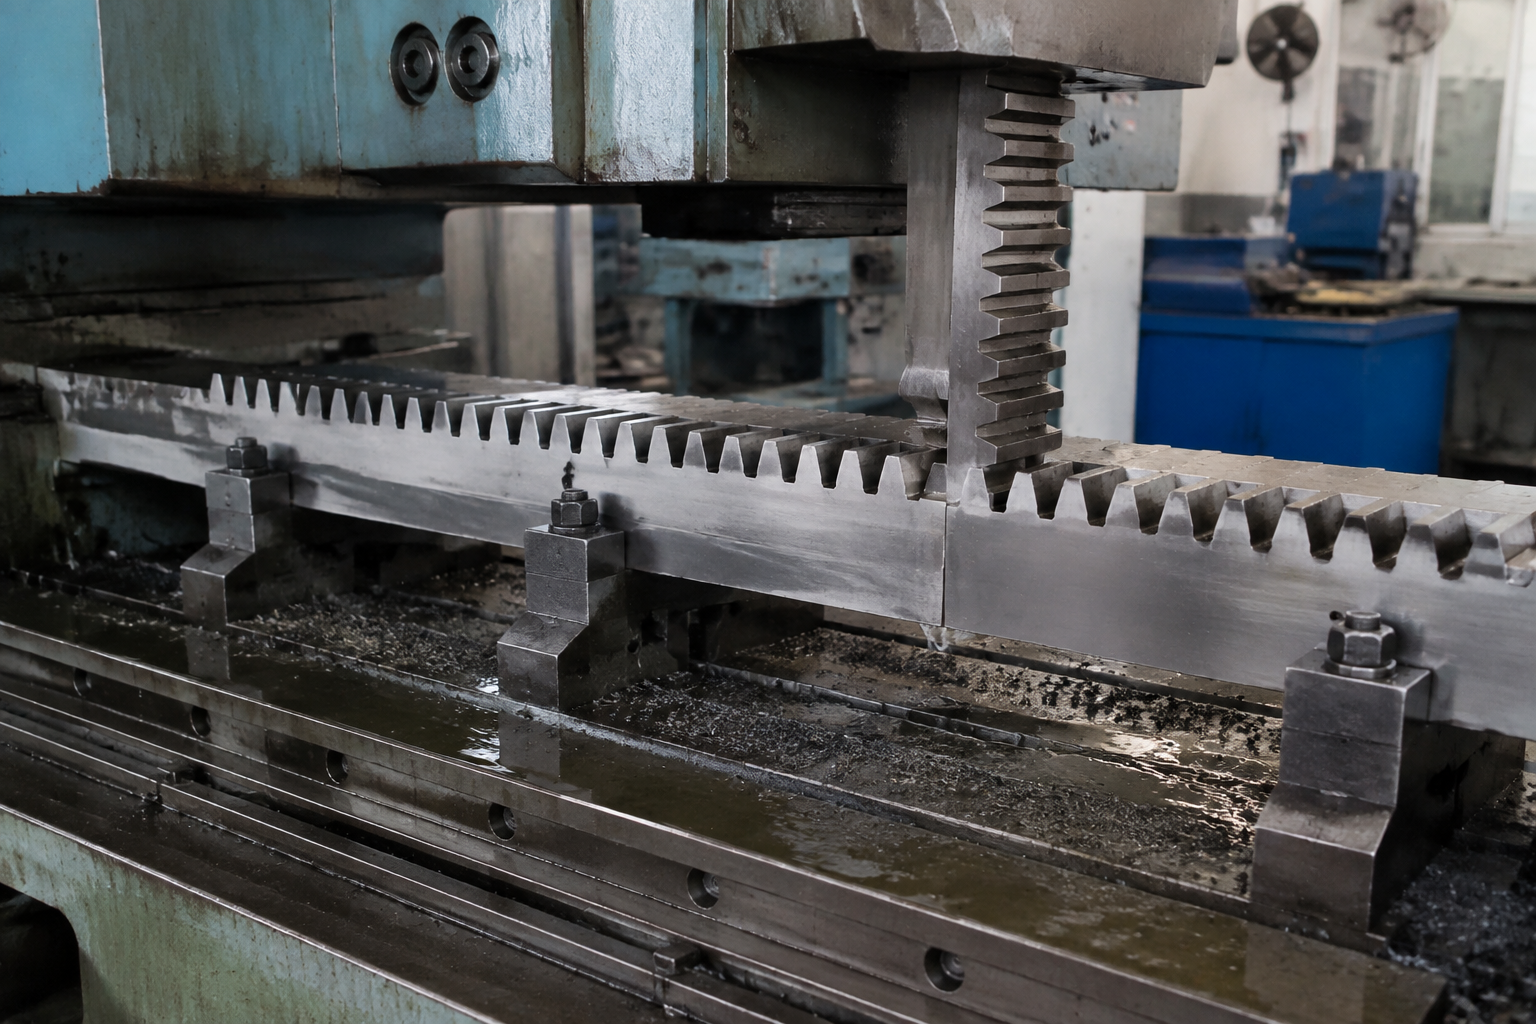
A horizontal broaching machine drives the broach along a level bed, parallel to the shop floor. The workpiece is fixtured stationary at working height, and the ram — running on precision ways along the bed — pulls or pushes the broach through the part in one horizontal pass. Most horizontal machines are pull-type internal machines, because a broach in tension cannot buckle, but the same bed-and-ram architecture also serves surface broaching and continuous chain broaching, where fixtured parts ride past stationary broaches without stopping.
Two structural facts define the category. The bed extends along the floor, so stroke capability grows outward rather than upward. And the work zone stays open at both ends and from above, so heavy parts reach the fixture with the cranes, hoists, and roller conveyors that most shops already own. If you are new to the process itself, start with our primer on what broaching is.
What Is a Vertical Broaching Machine?
For the basics of each configuration, see what horizontal broaching is and what vertical broaching is.
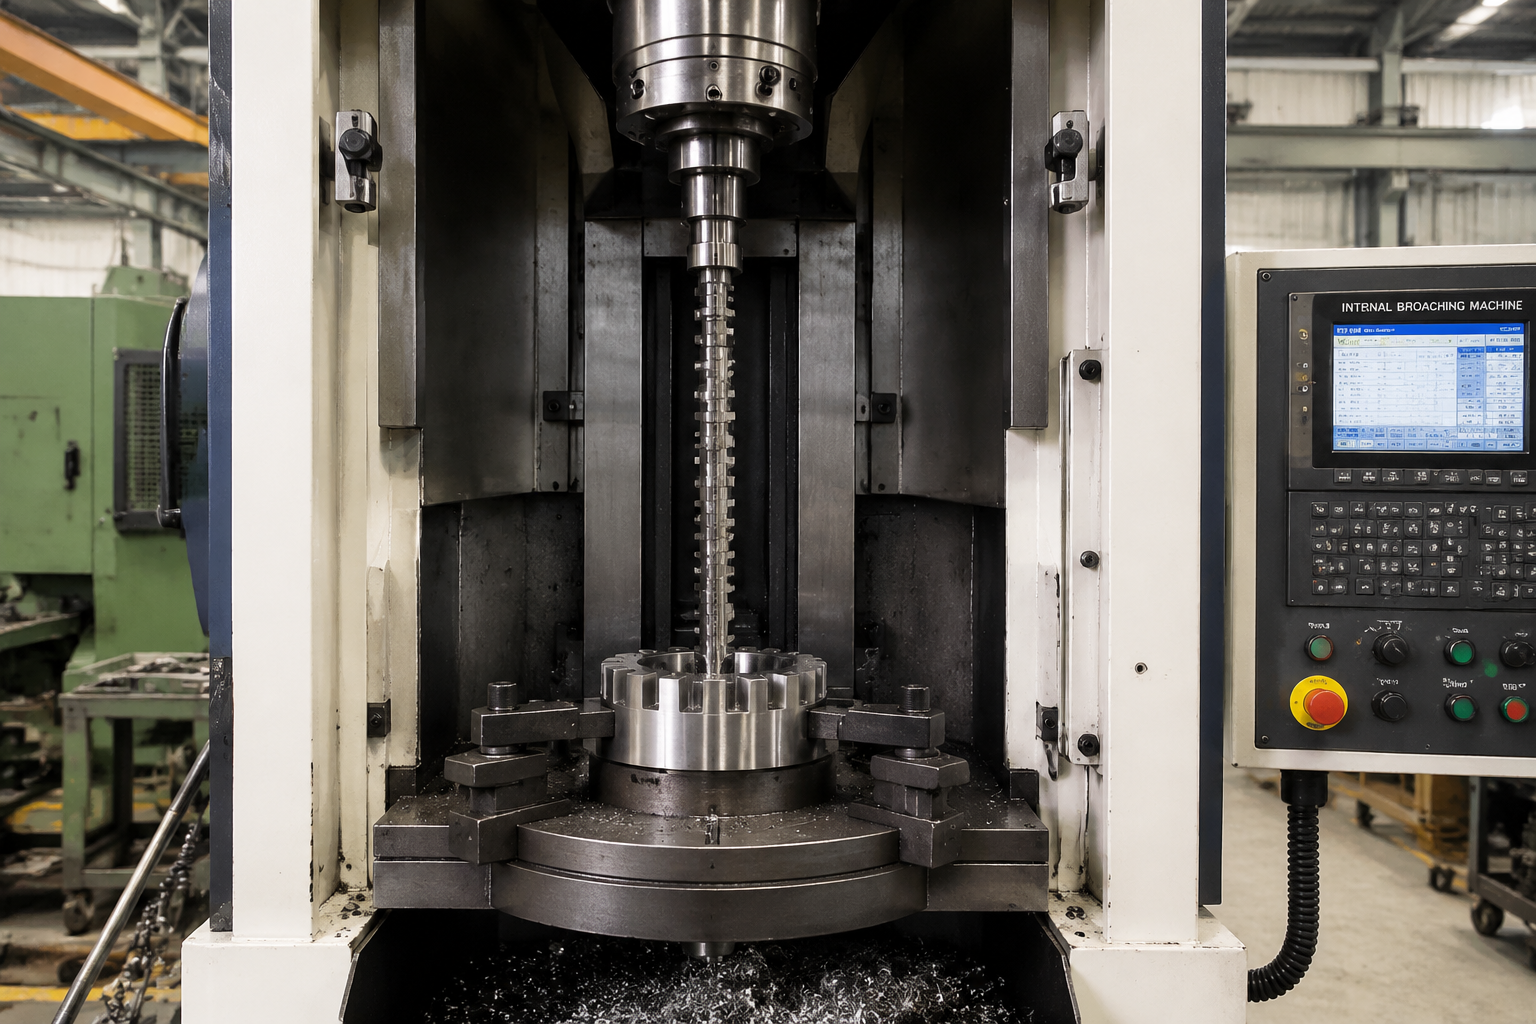
A vertical broaching machine carries its ram on an upright column, so the broach travels vertically — either pulled down through the part from an upper slide or pulled up through it from below. The machine grows upward instead of outward, which is why a vertical machine delivers a long stroke inside a compact footprint. Internal work dominates (keyways, splines, hex sockets, polygon bores), and the main configurations — pull-up, pull-down, and push-type — differ mainly in where the part sits and which direction gravity acts on the chips. Surface work happens on vertical surface machines as well; see our surface broaching machine guide for that family.
Vertical machines own the middle of the part-size range and the top of the volume range. Typical work includes internal splines and keyways in transmission gears, hexagon and square sockets in fittings and hand tools, bore forms in wheel hubs and brake components, and exterior flats and slots on small castings and forgings — parts measured in hundreds of grams to a few dozen kilograms, produced in thousands per shift, often fed by automation rather than an operator.
The classic horizontal workload is large and long: internal splines and keyways in gears, sprockets, and pump housings; bore and face work on cylinder blocks and heads; deep features in tubes and barrels; and exterior flats, slots, and dovetails on chassis castings. High-volume small parts — lever forks, link ends, pads — also land here when they feed a continuous chain machine, where the broaches stand still and the parts ride past.
Horizontal vs. Vertical Broaching: 7 Differences That Drive the Decision
The table below summarizes the seven factors; the sections after it explain the engineering reason behind each difference, because the “why” is usually what settles the argument on a specific part.
| Factor | Horizontal machine | Vertical machine |
|---|---|---|
| Stroke direction | Ram travels level along a floor bed | Ram travels up or down an upright column |
| Floor space and installation | Long, low footprint; no pit, no special ceiling | Compact footprint; stroke is bounded by building height or pit depth |
| Stroke length ceiling | Practically unlimited — beds extend to carry multi-meter broaches | Long broaches get awkward to hang and support |
| Chip and coolant flow | Chips travel along the bed; flushing must be engineered | Gravity pulls chips and coolant down and out of the cut continuously |
| Workpiece handling | Heavy parts load from above at working height with cranes or rollers | Parts load onto a fixture table; small and mid-size parts are natural, very heavy parts need lift planning |
| Automation pattern | In-line flow: conveyor in, cut, conveyor out | Turret and shuttle patterns: load, broach, and unload in overlapping time |
| Cost profile | Generally lower purchase price; larger footprint and lower tooling cost | Higher entry price for servo and twin-ram designs; saves floor and often wins on cost per part at volume |
1. Stroke Direction and Machine Structure
The fundamental difference is geometric: a horizontal machine lays its stroke along the floor, a vertical machine stands it upright. Everything else follows from that choice. On a horizontal machine, the broach lies along its full length on the bed, supported and guided, and the part rests on level locators with cutting force pressing it into its seat. On a vertical machine, the broach hangs from or rises toward the slide, and the part sits on a table or fixture face directly in the tool path. Neither layout cuts better — they cut differently, and the part decides which geometry is convenient.
2. Floor Space and Installation
A horizontal machine trades height for length. The bed scales with stroke and broach length, so the machine occupies a long rectangle of floor — but it installs directly on a standard slab, needs no pit, and stays within ordinary ceiling height. A vertical machine makes the opposite trade: it occupies a compact footprint that fits inside a small cell, but its stroke is bounded by the building. Some pull-down and table-up designs need an overhead clearance allowance or a floor pit to gain stroke, which means foundation work and a machine that is harder to relocate later. If your building has low bays, the horizontal layout sidesteps the problem entirely; if floor space is the scarce resource, vertical wins on the same stroke.
3. Stroke Length Capability
Why can horizontal machines run longer strokes? Because the bed extends along the floor, adding stroke means adding bed length — there is no practical ceiling. A long internal spline or deep keyway demands a long broach, and a long broach is a heavy, slender precision tool. Hung vertically, its own weight works against the guidance and support it needs; laid horizontally, the full length of the tool rests on the bed’s support rollers and ways. This is why deep bores in tubes and barrels, and splines running the length of a shaft, are almost always cut horizontally. On a vertical machine, the stroke you can buy is the stroke your building can stand — plus pit depth if you are willing to dig one.
4. Chip Removal and Coolant Handling
Vertical machines hold a structural advantage here, and the reason is gravity. As the broach cuts downward, chips and coolant fall away from the cutting zone continuously — flushed from above, they drain below, keeping finished teeth clear of debris and the part clean. On a horizontal machine, chips exit the cut at the same height they are created and travel along the bed, so the machine depends on engineered flushing, sloped beds, or chip conveyors to move them. Why does this matter enough to swing a decision? Recut chips trapped in the work zone score the finished surface and accelerate tooth wear, so difficult, stringy materials raise the premium on the vertical layout’s natural cleanliness.
5. Workpiece Size, Shape, and Handling
Match the machine to the part’s natural resting posture. Large, heavy, flat-backed workpieces — steering knuckles, control arms, cylinder blocks, large valve bodies — are awkward to stage upright but lie naturally on horizontal locators, and overhead cranes or rollers deliver them from the direction heavy parts prefer to move. Vertical machines favor parts that sit stable on a fixture table: gears, sprockets, hubs, pulleys, and components with large diameters and short lengths, as well as small high-volume parts like lever forks and fittings. A general rule that holds well: if the part needs a crane, think horizontal; if it fits in two hands or a chute, vertical loading is faster and less fatiguing for the operator.
6. Automation and Line Integration
The two layouts automate in different patterns, and the pattern usually follows the plant’s material flow. Horizontal machines suit in-line integration: parts arrive on a conveyor at fixed height, get broached, and leave in a straight line — the native rhythm of automotive transfer lines. Vertical machines suit overlapping cycles: rotary indexing tables and shuttle systems let one station load while another cuts, and pull-up machines place the loading station low, exactly where bowl feeders and pick-and-place units want to work. Twin-slide vertical machines take this further, cutting two features or two parts in alternating strokes. Neither approach is inherently more productive; the question is which one matches the line the machine must join.
7. Machine Cost and Tooling Cost
Horizontal machines are generally the lower-ticket entry: the structure is simpler, the installation is a standard slab, and retooling between jobs is quick, which keeps tooling-related cost down when volumes are modest or part variety is high. Vertical machines — particularly servo-driven and twin-ram designs — carry a higher purchase price, but they repay it where floor space is expensive and volumes are high, because the compact footprint and faster automated cycles push cost per part down. One rule worth more than the price tags: if you already own a library of broaches from a horizontal machine, staying horizontal lets that inventory keep working. For a fuller breakdown of what each configuration costs to buy and run, see our broaching machine price guide.
How to Choose: A Four-Question Decision Framework
Set the spec sheets aside for a moment and answer four questions about your own production. Each answer points at one layout, and when the answers disagree, weight them in this order.
Question 1: What does the workpiece look like?
Weigh the part and picture its resting posture. Parts over roughly 50 kg, or long parts with features along their length, load and locate better lying flat — horizontal. Small and mid-size parts with internal features, and disc-shaped parts with large diameters and short lengths, load faster onto a vertical fixture table — vertical. This first question eliminates more options than any spec comparison.
Question 2: How much stroke does the feature need?
Remember that stroke length is not the same as cut length: the ram must pull the entire broach clear of the work. Add the broach length, the part length, and clearances, then compare the total against your building’s vertical budget. When the required stroke exceeds what your ceiling (plus any pit you are willing to excavate) can offer, the decision is made for you — horizontal.
Question 3: What does your floor space and building allow?
Measure the actual footprint available, not the one on the drawing. A long horizontal bed competes with aisles and adjacent cells; a tall vertical machine competes with cranes, mezzanines, and overhead utilities. Also check the foundation: a pit or special anchoring adds cost and permanence to a vertical installation, while a horizontal machine bolts to a standard slab and can move with the layout.
Question 4: How will parts load, unload, and flow?
Sketch the part’s journey through the cell. If parts move on a conveyor line at fixed height — in-line flow — a horizontal machine accepts and releases them without a lift. If you want overlapping load-and-cut cycles, indexing tables, or feeder-fed small parts, the vertical layout is built for it. And if volumes are still uncertain, favor the machine that retools cheaply: that is usually the horizontal.
For a deeper walk through this decision — tonnage, drive types, tolerance capability, and new-versus-used tradeoffs — see our dedicated article on how to choose the right broaching machine.
Quick Reference: Where Common Parts Usually Land
A shortcut built from shop-floor practice — useful for a first cut at the decision before the four questions above are asked in earnest:
- Transmission gears, sprockets, pulleys, wheel hubs — internal splines and keyways in mid-size parts: vertical, usually pull-down.
- Fittings, hex sockets, hand-tool components — small parts at high volume: vertical pull-up, feeder-fed.
- Steering knuckles, control arms, crossmembers — heavy castings with exterior surfaces: horizontal surface machines.
- Cylinder blocks and heads — large castings, multiple features: horizontal, in-line with the machining line.
- Long shafts, tubes, barrel bores — deep features along the length: horizontal internal machines; no practical vertical alternative.
- Lever forks, link ends, pads in very high volume — small external features: horizontal continuous chain machines.
Treat the list as a starting point, not a verdict — tolerances, materials, and volumes can move a part from one column to the other. When two of the four questions above point the same way, that is your machine.
Frequently Asked Questions
What is the difference between horizontal and vertical broaching?
The difference is the direction of the cutting stroke. A horizontal broaching machine drives the broach along a level bed, parallel to the floor; a vertical broaching machine drives it up or down an upright column. The cut quality is comparable in both layouts — the real consequences are practical: horizontal machines offer longer strokes and easier handling of heavy parts, while vertical machines offer a compact footprint, gravity-assisted chip removal, and automation-friendly loading stations.
Which is better, horizontal or vertical broaching?
Neither is better overall — each wins on specific work. Choose horizontal for long strokes (deep splines, long keyways), large heavy workpieces that load from above, and in-line conveyor flow. Choose vertical for small and mid-size parts, tight floor space, stringent cleanliness needs in difficult materials, and overlapping-cycle automation. Many plants run both, each assigned to the parts it handles best.
Why are most broaching machines vertical?
Because the vertical layout solves three everyday production problems at once. It grows upward, so it delivers a useful stroke in a compact footprint. Gravity pulls chips and coolant out of the cut, keeping tools and parts clean without elaborate flushing. And parts load at a convenient station height, which suits both operators and automated feeders. For the majority of parts — gears, hubs, fittings, and similar small-to-mid-size work — those advantages compound, which is why vertical machines outnumber horizontal ones on most shop floors.
What is a linear broaching machine?
A linear broaching machine is any machine that cuts by moving a multi-tooth broach in a straight line through or across the workpiece, completing the feature in one pass. Both horizontal and vertical broaching machines are linear broaching machines — the label describes the straight-line cutting motion, not the machine’s orientation. The alternative is rotary broaching, which spins and wobbles a form tool into the part on a lathe or screw machine to cut a polygon on center. Linear machines handle the long-form work rotary broaching cannot: keyways, splines, and profiles with depth.
The Bottom Line
Horizontal and vertical broaching machines are not competitors — they are the same process pointed in two directions. Let the workpiece make the call: heavy and long parts with deep features belong on the horizontal bed; compact parts, tight floors, and automated cells belong on the vertical column. When the answers conflict, weight the part first, stroke second, floor third, and flow fourth. And when you are ready to compare actual machines, contact BroachingMach — as a broaching machine manufacturer we build both configurations and can recommend the right one for your parts, volumes, and building.